本文例举利用 AI 生成模板代码,探索 AI 生成重复性高、逻辑性低的代码来减少重复劳动的可行性。文中使用的编程工具为 Cursor。
代码质量测评
首先肯定要去验证一下,AI 生成的代码是否可靠、实用。刚好我有个祖传博客代码需要重构,可以通过 AI 来生成一下其中的文章模块。
在 Cursor 编辑器中创建 app.js,按住 command + K 输入 prompt。
这里我写 prompt 习惯是,我要用框架/库实现什么功能,其中的细节是什么。这样描述基本能让 AI 理解你的需求
创建 express 服务
利用express启动一个服务
const express = require('express'); // 引入express模块
const app = express(); // 创建express实例

app.listen(3000, () => { // 监听3000端口
  console.log('Server started on port 3000');
});
第二步连接数据库,因为这里可能涉及到改动原先的代码,所以可以先全选代码,再输入 prompt,编辑器会在原代码上做修改。
连接 mongo,database 为 blog
const express = require('express'); // 引入express模块
const mongoose = require('mongoose'); // 引入mongoose模块
const app = express(); // 创建express实例

mongoose.connect('mongodb://localhost/blog', { useNewUrlParser: true }); // 链接mongo,database为blog

app.listen(3000, () => { // 监听3000端口
  console.log('Server started on port 3000');
});
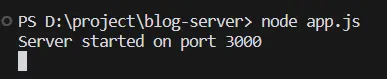
最终成功启动服务
创建文章 model
用 mongoose 创建文章 schema
包含标题、内容、摘要,类型自行判断
timestamps 为 true
最后导出
const mongoose = require('mongoose');

const articleSchema = new mongoose.Schema({
  title: {
    type: String,
    required: true
  },
  content: {
    type: String,
    required: true
  },
  summary: {
    type: String,
    required: true
  },
}, { timestamps: true });

module.exports = mongoose.model('Article', articleSchema);
其中我提到了“类型自行判断”,实际上并不需要,因为在你没提到的内容,它会自行给到它推断合理的代码。不会因为你不说,就不会生成。但是对于一些特定的参数,比如 timestamps,就需要额外指定。
创建文章 controller
创建 controller 需要导入之前写的 model,但是编辑器不会跨文件解析。这时你可以在 prompt 说明在哪个文件中导入叫哪个名字的 model,甚至可以直接把代码贴在 prompt 中
// model.js 代码....
根据以上文章model代码,导入并生成文章的增删改查、获取文章列表的controllerconst Article = require('./model');
exports.createArticle = async (req, res) => {
try {
const article = await Article.create(req.body);
res.status(201).json(article);
} catch (error) {
res.status(500).json({ error: error.message });
}
};
exports.getArticleById = async (req, res) => {
try {
const article = await Article.findById(req.params.id);
if (!article) {
return res.status(404).json({ error: 'Article not found' });
}
res.json(article);
} catch (error) {
res.status(500).json({ error: error.message });
}
};
exports.updateArticle = async (req, res) => {
try {
const article = await Article.findByIdAndUpdate(req.params.id, req.body, { new: true });
if (!article) {
return res.status(404).json({ error: 'Article not found' });
}
res.json(article);
} catch (error) {
res.status(500).json({ error: error.message });
}
};
exports.deleteArticle = async (req, res) => {
try {
const article = await Article.findByIdAndDelete(req.params.id);
if (!article) {
return res.status(404).json({ error: 'Article not found' });
}
res.status(204).send();
} catch (error) {
res.status(500).json({ error: error.message });
}
};
exports.getArticles = async (req, res) => { // Adding a new controller to get all articles
try {
const articles = await Article.find();
res.json(articles);
} catch (error) {
res.status(500).json({ error: error.message });
}
};以上代码大致还行,看起来能跑,但是太简单了。获取文章列表没有分页等功能,当然也是我的 prompt 写得不够详细。下面再优化一下
选中 getArticles 方法
修改getArticles,支持分页查询和文章标题模糊搜索
exports.getArticles = async (req, res) => { // Adding a new controller to get all articles
  try {
    const { page = 1, limit = 10, title } = req.query;
    const query = {};
    if (title) {
      query.title = { $regex: title, $options: 'i' };
    }
    const articles = await Article.find(query)
      .limit(limit * 1)
      .skip((page - 1) * limit)
      .exec();
    const count = await Article.countDocuments(query);
    res.json({
      articles,
      totalPages: Math.ceil(count / limit),
      currentPage: page
    });
  } catch (error) {
    res.status(500).json({ error: error.message });
  }
};
还行吧。。至少说明有足够详细的 prompt 就可以生成对应的功能代码。
注册路由
最后创建 routes.js 注册文章路由。这次我描述一下 controller 里面的内容
从controller.js导入 createArticle、getArticleById、updateArticle、deleteArticle、getArticles方法
注册相应的express路由const express = require('express');
const router = express.Router();
const { createArticle, getArticleById, updateArticle, deleteArticle, getArticles } = require('./controller');
router.post('/', createArticle);
router.get('/:id', getArticleById);
router.put('/:id', updateArticle);
router.delete('/:id', deleteArticle);
router.get('/', getArticles);
module.exports = router;最后把路由挂载在 express 上,顺便注册插件解决一下 json 参数问题
注册article文件夹下的routes
注册json插件
const express = require('express'); // 引入express模块
const mongoose = require('mongoose'); // 引入mongoose模块
const app = express(); // 创建express实例
const articleRoutes = require('./article/routes'); // 引入article文件夹下的routes
const bodyParser = require('body-parser'); // 引入body-parser模块

mongoose.connect('mongodb://localhost/blog', { useNewUrlParser: true }); // 链接mongo,database为blog

app.use(bodyParser.json()); // 注册json插件
app.use('/article', articleRoutes); // 注册article文件夹下的routes

app.listen(3000, () => { // 监听3000端口
  console.log('Server started on port 3000');
});
总结
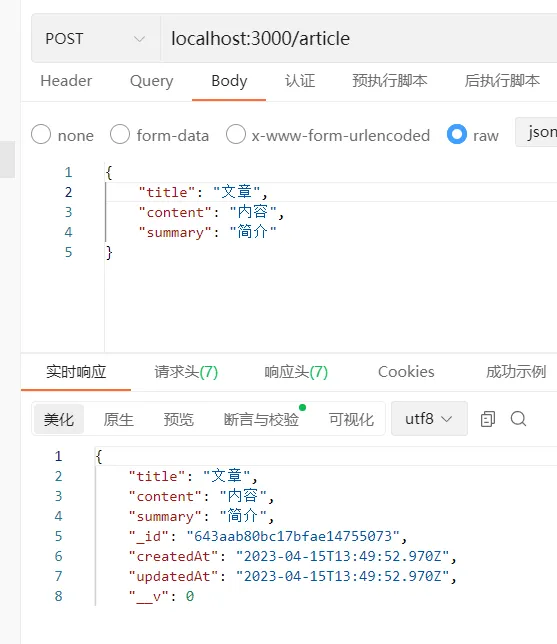
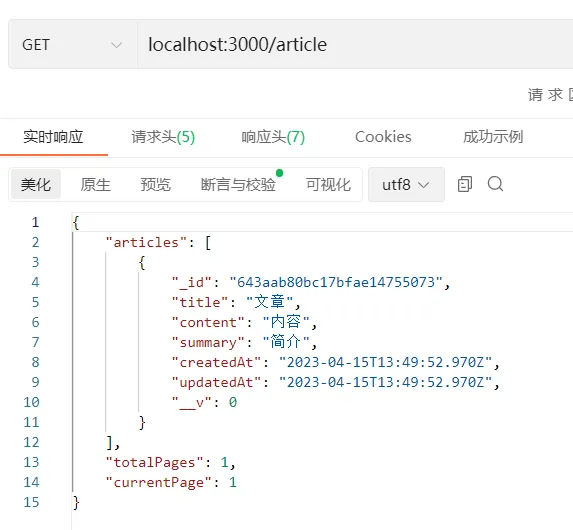
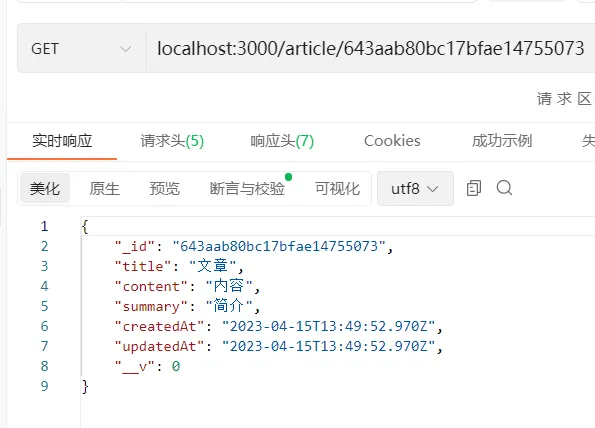
验证一下接口是否可用
创建文章
获取列表
获取详情
更新文章
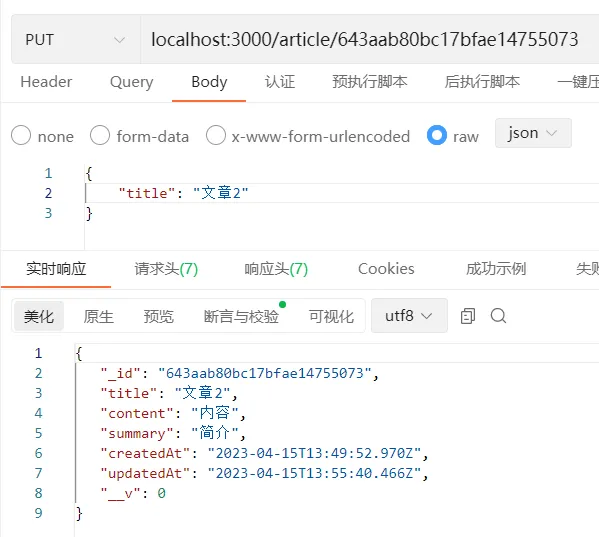
当然以上的功能还是不完善的,比如还缺少权限认证,但只要你有相应的 prompt,就可以生成对应的代码,因为篇幅关系就不展示了。以上的测评至少可用说明 AI 生成的代码是可用的。
但是以上的代码还是太太太简单了,远远达不到生产代码,只能当做花瓶。要达到能在生产使用的模板代码,还需要做些额外的操作。
模板代码的生成
先思考一下,作为前端写过最多的 UI 界面是什么?如果是 B 端开发,围绕着各种管理后台,肯定绕不过表格表单。
我在 3 年前写过一个早期的低代码平台,通过拖拖拽拽生成 UI 代码。
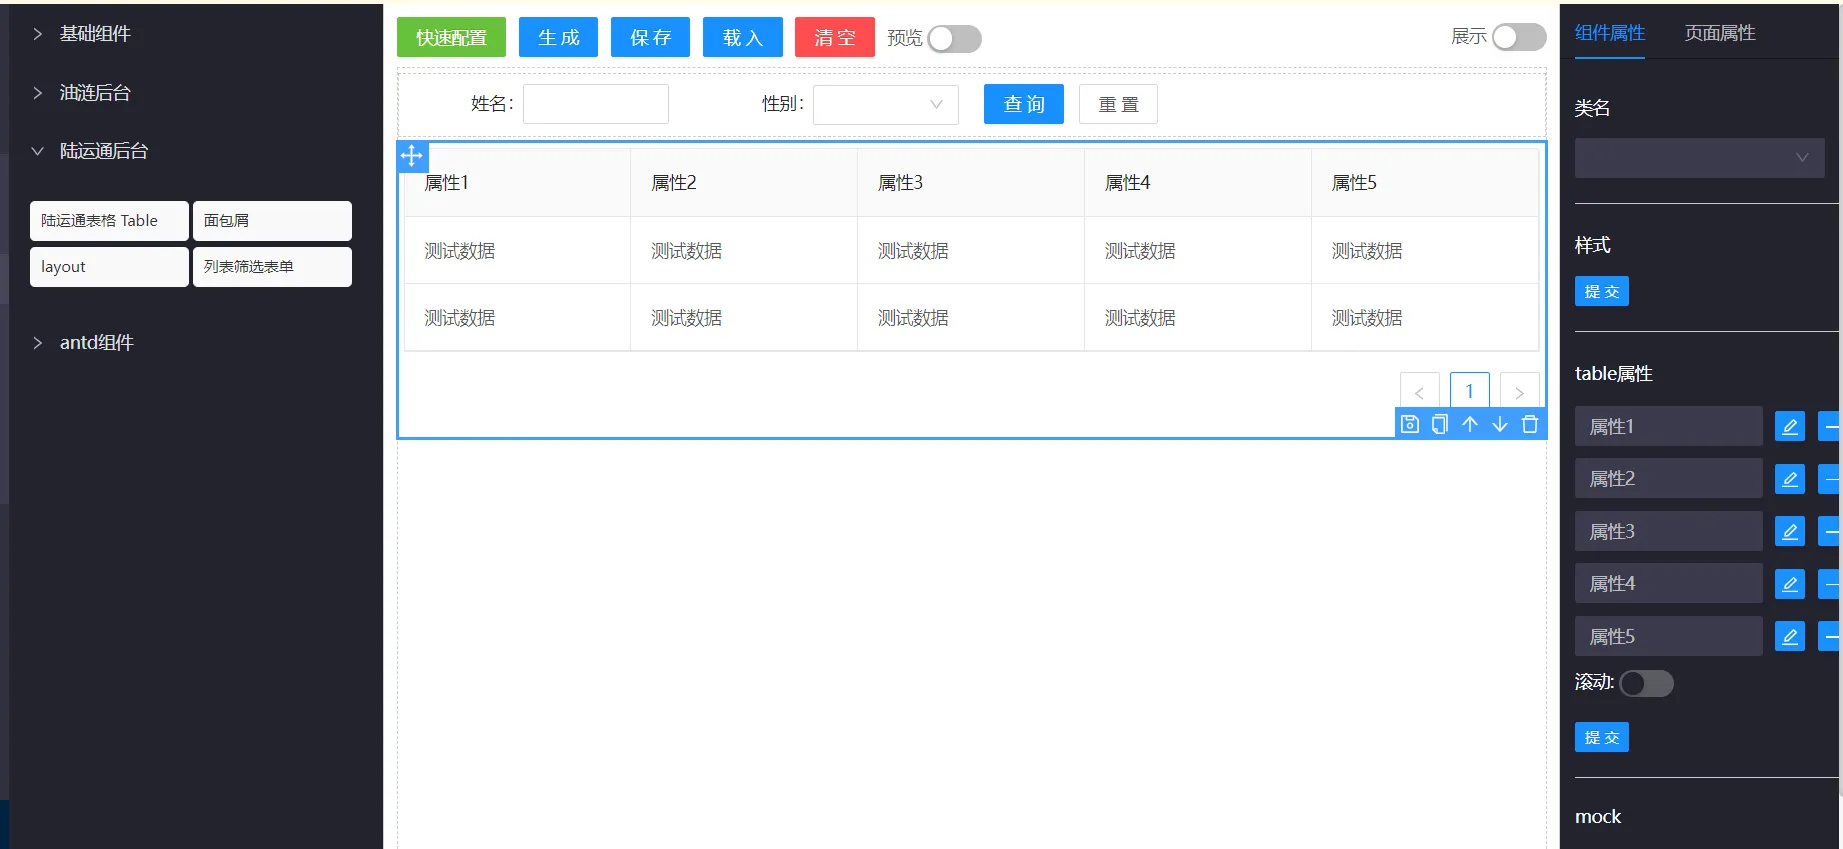
这种在当时看起来还是比较好的生成代码方案,但也存在几个致命的问题
- 依赖于框架
比如上述平台生成的是 React 代码,换了工作用了 Vue,那基本就废弃了。再写一套模板的工作量是很大的
- 依赖于业务
假如换了另一套业务,上面的 UI 也不太适用了,得重新编写物料组件,同样工作量不小
- 难以涉及简单逻辑
比如表格中的操作按钮,可能会有链接、删除、打开某个弹窗,即便是简单逻辑也很难去编写、配置
所以换了工作就没动力维护了
等到 AI 出现能处理代码,我觉得这一切都可行了,毕竟 AI 就是一个天然庞大的物料组件库。
简单 UI 模板
以 Vue3 + ant-design-vue 为例,先写一个 Table 组件的基础模板,通过描述表格项 prompt 来让 AI 帮我们生成。
<template>
    <a-table
        :data-source="dataSource"
        :columns="columns">
    </a-table>
</template>
<script setup>
import { ref } from 'vue';

const dataSource = ref([]);

const columns = [];
</script>
生成学号、姓名、性别、出生年月、操作这5项。
出生年月格式化年月日形式
操作包含查看详情、删除
<template>
  <a-table
    :data-source="dataSource"
    :columns="columns"
  >
    <template #birth="{ text }">
      {{ new Date(text).toLocaleDateString() }}
    </template>
    <template #action>
      <a @click="handleView">查看详情</a>
      <a-divider type="vertical" />
      <a @click="handleDelete">删除</a>
    </template>
  </a-table>
</template>

<script setup>
import { ref } from 'vue';

const dataSource = ref([
  {
    id: 1,
    name: 'John Doe',
    gender: 'Male',
    birth: '1990-01-01',
  },
  {
    id: 2,
    name: 'Jane Doe',
    gender: 'Female',
    birth: '1995-05-05',
  },
]);

const columns = [
  {
    title: '学号',
    dataIndex: 'id',
  },
  {
    title: '姓名',
    dataIndex: 'name',
  },
  {
    title: '性别',
    dataIndex: 'gender',
  },
  {
    title: '出生年月',
    dataIndex: 'birth',
    slots: { customRender: 'birth' },
  },
  {
    title: '操作',
    slots: { customRender: 'action' },
  },
];

function handleView() {
  // handle view logic here
}

function handleDelete() {
  // handle delete logic here
}
</script>
生成的代码是可运行的,还帮你 mock 了数据,但还有小问题。其中 column.slots 已经被新版的 antdv 废弃了,虽然能用但我还是想用最新的写法。其次我希望用 dayjs 库来格式化时间。于是来修改一下模板
<template>
    <a-table
        :data-source="dataSource"
        :columns="columns">
+        <template #bodyCell="{ column, record }">
+        </template>
    </a-table>
</template>
<script setup>
import { ref } from 'vue';

const dataSource = ref([]);

const columns = [];
</script>
生成学号、姓名、性别、出生年月、操作这5项。
其中出生年月是自定义项,在表格中用dayjs格式化年月日形式
操作是自定义项,包含查看详情、删除<template>
<a-table
:data-source="dataSource"
:columns="columns"
>
<template #bodyCell="{ column, record }">
<template v-if="column.key === 'birth'">{{ dayjs(record[column.key]).format('YYYY-MM-DD') }}</template>
<template v-else-if="column.key === 'action'">
<a-button type="link" @click="handleView(record)">查看详情</a-button>
<a-button type="link" @click="handleDelete(record)">删除</a-button>
</template>
<template v-else>{{ record[column.key] }}</template>
</template>
</a-table>
</template>
<script setup>
import { ref } from 'vue';
import dayjs from 'dayjs';
const dataSource = ref([
{
id: 1,
name: '张三',
gender: '男',
birth: '1990-01-01',
},
{
id: 2,
name: '李四',
gender: '女',
birth: '1995-05-05',
},
]);
const columns = [
{
title: '学号',
dataIndex: 'id',
key: 'id',
},
{
title: '姓名',
dataIndex: 'name',
key: 'name',
},
{
title: '性别',
dataIndex: 'gender',
key: 'gender',
},
{
title: '出生年月',
dataIndex: 'birth',
key: 'birth',
},
{
title: '操作',
key: 'action',
},
];
const handleView = (record) => {
// handle view logic here
};
const handleDelete = (record) => {
// handle delete logic here
};
</script>这样就符合我的要求了。其实即便没有模板,AI 也能给你生成像样的代码。这里模板代码的作用就是限制 AI 在你的模板上生成符合你的要求的代码。不过你也可以不用修改模板,或者补充 prompt 添加例如 不需要column.slots等更明确的说法,也能达到相同的效果。
逻辑生成
可能有人会说,上面的代码生成,我复制粘贴也可以,能省多少事?当然不止如此,同时我们也可以让 AI 去生成简单逻辑。比如查看详情按钮可以跳转学生的详情页,删除按钮弹出确认提示。修改下 prompt
查看详情点击后使用 vue-router 跳转学生详情页面
点击删除弹窗提示
其他不用修改
<template>
  <a-table
    :data-source="dataSource"
    :columns="columns"
  >
    <template #bodyCell="{ column, record }">
      <template v-if="column.key === 'birth'">{{ dayjs(record[column.key]).format('YYYY-MM-DD') }}</template>
      <template v-else-if="column.key === 'action'">
        <a-button type="link" @click="handleView(record)">查看详情</a-button>
        <a-button type="link" @click="handleDelete(record)">删除</a-button>
      </template>
      <template v-else>{{ record[column.key] }}</template>
    </template>
  </a-table>
</template>

<script setup>
import { ref } from 'vue';
import dayjs from 'dayjs';
import { useRouter } from 'vue-router';
import { Modal } from 'ant-design-vue';

const dataSource = ref([
  {
    id: 1,
    name: '张三',
    gender: '男',
    birth: '1990-01-01',
  },
  {
    id: 2,
    name: '李四',
    gender: '女',
    birth: '1995-05-05',
  },
]);

const columns = [
  {
    title: '学号',
    dataIndex: 'id',
    key: 'id',
  },
  {
    title: '姓名',
    dataIndex: 'name',
    key: 'name',
  },
  {
    title: '性别',
    dataIndex: 'gender',
    key: 'gender',
  },
  {
    title: '出生年月',
    dataIndex: 'birth',
    key: 'birth',
  },
  {
    title: '操作',
    key: 'action',
  },
];

const router = useRouter();

const handleView = (record) => {
  router.push(`/student/${record.id}`);
};

const handleDelete = (record) => {
  Modal.confirm({
    title: '确认删除',
    content: `确定要删除学号为 ${record.id} 的学生吗?`,
    onOk() {
      // handle delete logic here
    },
  });
};
</script>
基本实现了简单逻辑,如果需要更多逻辑编写,只要描述对应的 prompt 即可。
代码识别
在真实的开发环境中,其实没有这么多“demo”型的基础代码,更多是封装过的。那 AI 是否能理解这些代码,并能在这基础上生成我们需要的代码?
下面写了一个自定义组件,并且用了一个自定义 hooks,同样的需求看是否能生成。
<template>
  <my-table
    :data="data"
    :loading="loading"
    :columns="columns"
    :pagination="pagination"
    @change="handleTableChange">
    <template #bodyCell="{ column, record, index }">
          <template v-if="column.dataIndex === 'action'">
              <span>
                  <a>操作</a>
              </span>
          </template>
      </template>
  </my-table>
</template>

<script setup>
import { ref } from 'vue';
import useTable from '@/hooks/useTable';

const data = ref([]);
const columns = [];

const {
    pagination,
    loading,
    handleTableChange
} = useTable();

</script>
生成学号、姓名、性别、出生年月、操作这5项。
mock2组数据
操作是自定义项,包含查看详情、删除
表格组件的change事件会传递页码信息,现在需要在当前方法上再封装一层打印页码<template>
<my-table
:data="data"
:loading="loading"
:columns="columns"
:pagination="pagination"
@change="handleTableChangeWithLogging">
<template #bodyCell="{ column, record, index }">
<template v-if="column.dataIndex === 'action'">
<span>
<a @click="handleViewDetail(record)">查看详情</a>
<a @click="handleDelete(record)">删除</a>
</span>
</template>
</template>
</my-table>
</template>
<script setup>
import { ref } from 'vue';
import useTable from '@/hooks/useTable';
const data = ref([
{
id: '001',
name: 'John Doe',
gender: 'Male',
birth: '1990-01-01'
},
{
id: '002',
name: 'Jane Doe',
gender: 'Female',
birth: '1995-05-05'
}
]);
const columns = [
{
title: '学号',
dataIndex: 'id'
},
{
title: '姓名',
dataIndex: 'name'
},
{
title: '性别',
dataIndex: 'gender'
},
{
title: '出生年月',
dataIndex: 'birth'
},
{
title: '操作',
dataIndex: 'action'
}
];
const {
pagination,
loading,
handleTableChange
} = useTable();
const handleViewDetail = (record) => {
console.log(`View detail of record with id ${record.id}`);
};
const handleDelete = (record) => {
console.log(`Delete record with id ${record.id}`);
};
const handleTableChangeWithLogging = (pagination, filters, sorter) => {
console.log(`Current page: ${pagination.current}`);
handleTableChange(pagination, filters, sorter);
};
</script>这次提出了 4 个需求,1-3 是都可以直接实现的,至少 AI 能通过变量命名和模板代码示例能理解它是做什么的。但是对于第 4 个需求,想打印页码,试了几次终于写出了合理 prompt 让它帮我生成了对应的方法。从这里开始就有负担了(太难写了)我得描述得很清楚,如果想实现其他功能,我可能要把这个 my-table 组件的文档贴给它。
所以我们需要充足的 prompt 库。
总结
通过 AI 生成模板代码的效果总体令人差强人意,但是在我这么多次实验下来,还是展露了一些问题。比如同样的 prompt 生成的代码略微都有不相同之处。相比于之前提到的低代码平台生成的模板代码,低代码平台能生成更稳定、一致的代码。而 AI 生成的,还是可能得需要我们去微调,无法保证生成即可使用。
其实主要的原因还是在于我们的 prompt 描述得不够细致,无法让 AI 理解我们的具体需求,以至于无法让 AI 限定生成我们想要的代码。所以如果真正要实现完全靠 AI 生成模板代码,则需要一个庞大的 prompt 库的支持。
拓展
除了基础代码,其实还可以直接通过 AI 生成应用层面的东西。比如这个邮件

当然现在这种图片肯定不是靠手动画出来的,一般会有一个创作平台,有一套基础模板,然后妥妥拽拽生成想要的排版,再导出图片。
既然有了基础模板,那同理 AI 也可以直接生成,甚至你可以指挥它修改。
首先我也写一个简单的模板,大概这样
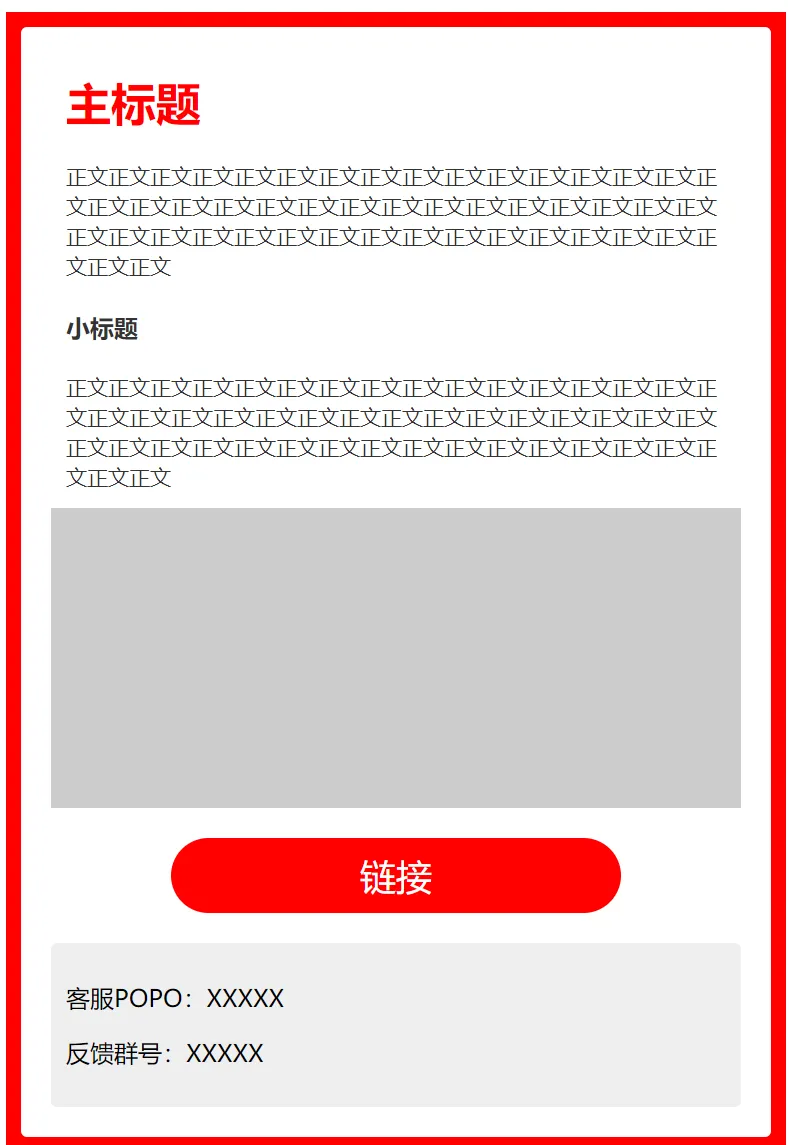
差不多就行。然后把模板和文章内容交给 AI,让它自行解析文章,匹配模板返回 html 代码。
下面是一段模板html代码客服POPO:XXXXX
返回结果:

大致差不多,还有一点点瑕疵,再微调一下
修改以上代码
“匠心卓越奖”改成小标题,设置红色
最后2张图片宽度改为49%,同一排展示
“若您有产品使用问题,请联系”这句话居中显示,与上面间距20像素
其他不变
最终结果

对于没有 html 基础的人来说,还算是方便的。
甚至不仅仅限制于代码,能让程序去完成的重复性劳动同样也能靠简单的语言指挥 AI 去做。比如结合命令行,输入 “删除某某文件” 这样的任务,让 AI 去理解你的意图,如把 delete filename 等关键字写入你提供的脚本,然后自动执行就可以指挥它做你想要做的事。
总结
与传统拼模板字符串的低代码工具相比,AI 生成的代码不局限于框架和语言,无论是 Vue 还是 React,无论是 js 还是 java 都能给到你想要的结果。但是低代码工具能生成非常标准且一致的代码,AI 则要更准确、详细的 prompt,不然生成的代码也会略有差别,还需要手动去调整。
与同类型产品 Copilot 相比,通过 GPT 模型生成通用且长的代码块更具有优势。但是在复杂逻辑上,开发者需要花费精力去表达逻辑,思考想要的东西,编写详尽的 prompt。即便如此,也并非一定能生成开发者想要的代码。但是 Copilot 没有这样的心智负担,它自己能通过代码上下文去理解开发者意图,再去给开发者提出建议。日常开发中能把两者结合使用,应该能提高很大的开发效率。
最后从上述的测评、测试来看,AI 生成的代码是可用但不是完美的。不过我们不用专门花心思去写某个功能的物料,只要平日多用多记录,把成功案例的 prompt 记录下来。等到下次再遇到类似的功能,就可以把之前的 prompt 拿过来做点修改就可以使用、生成代码了。